

Tiling Over Existing Tiles: When It Works
The adhesion and height checks first – and the cases where stripping is the honest answer
In short
Tiling over existing tiles – when it works, the adhesion and height checks first, and the cases where stripping is the honest answer.
13 min read
On this page
Curious: can you lay new tile over an old floor and save time without risking a failed job?
In Benoni, a quick decision can cost money. This guide shows when tiling over existing tiles is sensible and when removal is safer.
Start with a basic check: the substrate must be clean, dry and free of contaminants. Test moisture and bond before any tile installation begins to avoid future movement or water damage.
The SABS code SANS 10107:2011 sets the standard for ceramic tile installation in South Africa. Follow it for surface preparation, correct adhesive choice and proper grout detail to achieve a durable finish.
Use this practical guide to judge whether your current installation can accept new tiles or needs full removal. Requesting local quotes helps confirm site-specific factors like access, materials and labour.
Spend a little time on these checks and you’ll likely save money and frustration later.
Understanding the Feasibility of Tiling Over Existing Tiles
Before you start, inspect the current surface carefully. A new tile layer can work in Benoni if the base is sound and level — compare tiling prices for both options.

Check for stability: tap-test for loose areas, look for movement, and confirm the bathroom waterproofing below is intact with no moisture or rot. If the original layer is unstable, remove it for a fresh installation.
Consult a contractor via the platform — useful when planning bathroom renovations — to confirm access, materials and labour. A site visit will determine whether adhesive and substrate will bond correctly.
- Level, clean and damage-free surfaces are needed for a successful overlay.
- Loose pieces or damp patches mean you should strip back to substrate.
- Local tiling contractors can advise on adhesive choice and installation method.
| Check | Pass | Fail | Action |
|---|---|---|---|
| Level surface | Yes — proceed | No — level or remove | Re-level or remove layer |
| Bond | Firm | Loose | Strip and prepare substrate |
| Moisture | Dry | Wet/damaged | Repair and dry fully |
Essential Surface Preparation and Adhesion Checks
A quick tap with a broom handle tells you more than a visual check. Use the tap-test to find hollow or loose sections and mark any areas that sound different.
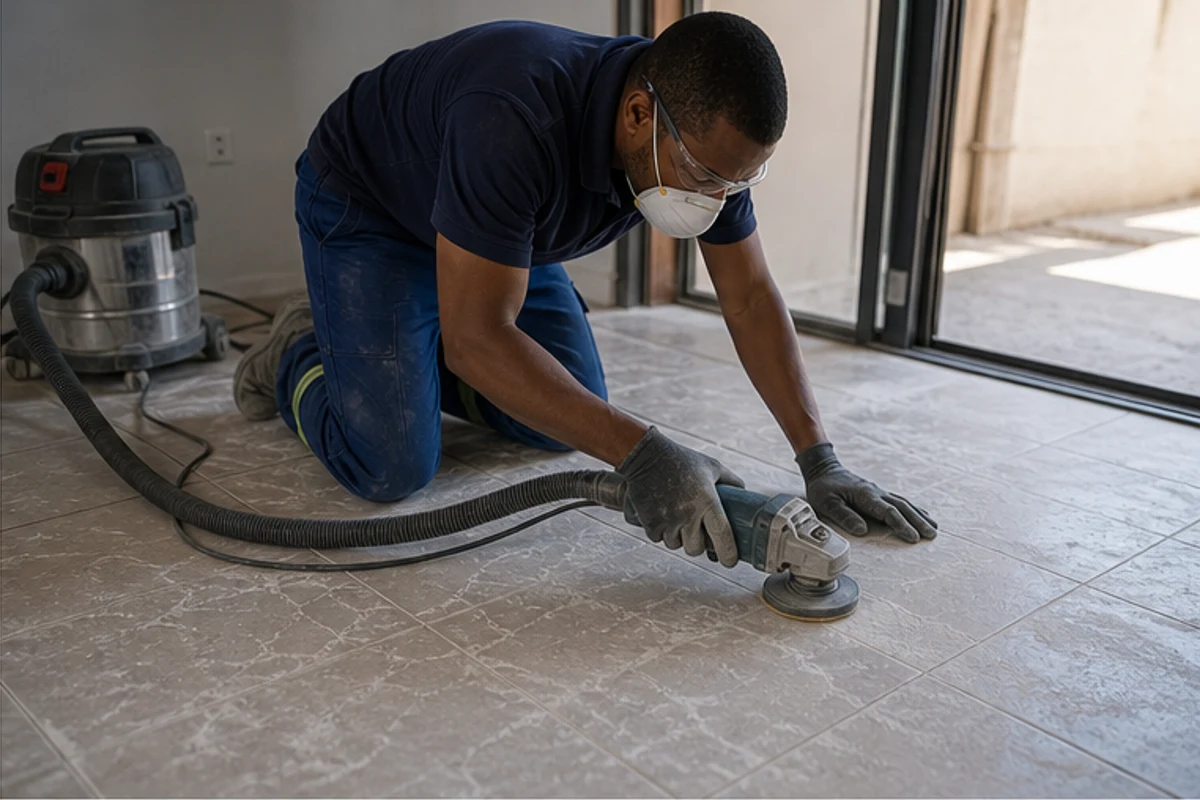
Tap-tests and sound floors
To ensure tiles firmly adhere to the substrate, tap each unit and note hollow spots. Remove any loose pieces and fill gaps with an appropriate screed to create a level layer.
“If a tile sounds hollow, remove it and repair the base before you lay new tiles.”
Degreasing and surface cleaning
Make sure the surface is completely clean and free from dust, polish or grease. Use a degreasing compound or degreasing soap on existing tiled surfaces so adhesives can form a correct bond.
- Apply tile adhesive with a notched trowel for even application and good contact.
- Confirm tile size and wall or floor type so the chosen adhesive suits the work.
- Allow the area to dry fully; trapped moisture will break the bond and ruin the installation.
Request local quotes via the platform to get contractors in Benoni who follow these surface preparation standards for every tile installation.
When Removing Old Tiles is the Better Option
When a floor shows cracks or soft spots, removing the old layer is often the safest choice. Small faults can hide larger issues in the substrate that will fail your new installation.
Remove rather than patch if you find mildew, retained moisture or widespread movement. These signs point to damp or rot that adhesives cannot fix.
Honest-stripping cases for shortcuts
Consider full demolition when the existing tiles are uneven, broken or not free cracks. Starting with a clean, level surface saves time and cost long-term.
“A solid base beats a quick fix—proper demolition protects your new finish.”
- Removing old tiles is best if you spot significant cracks or moisture.
- Make sure the substrate is dry and sound before any tiling work begins.
- Request quotes from Benoni contractors to compare removing old costs versus risks.
| Problem | Action | Why it matters |
|---|---|---|
| Cracked or loose units | Strip to substrate | Prevents grout failure and future movement |
| Signs of moisture | Remove and dry fully | Adhesive bonds require dry surfaces |
| Severe unevenness | Demolish and relevel | Ensures lasting installation and correct tile placement |
The Role of Professional Tiling Quotes in Benoni
Getting accurate quotes in Benoni stops guesswork and avoids unexpected costs. Request 3–5 quotes so you can compare prices, scope and contractor experience before you commit.
Visit buildingcontractorsinbenoni.co.za to start the quote request process and receive multiple offers from independent contractors in the area.
Professional contractors will inspect the site, check the condition of your existing tiles and assess the surface for moisture or movement. A good quote lists surface cleaning, adhesive choice, the application method and grout work.
- Ask for written items: scope, materials, labour and likely timelines.
- Ensure the price includes any surface repairs or moisture remediation.
- Compare contractor experience with tiling and past local installations.
“A detailed quote shows you where costs may change and what is fixed.”
Use buildingcontractorsinbenoni.co.za to manage quotes and make an informed decision that protects your budget and the lasting performance of the tile installation.
Technical Requirements for a Lasting Bond
Technical choices will determine whether your new layer lasts or fails. Start with correct surface preparation: remove dust, grease and any loose material so adhesives can grip.
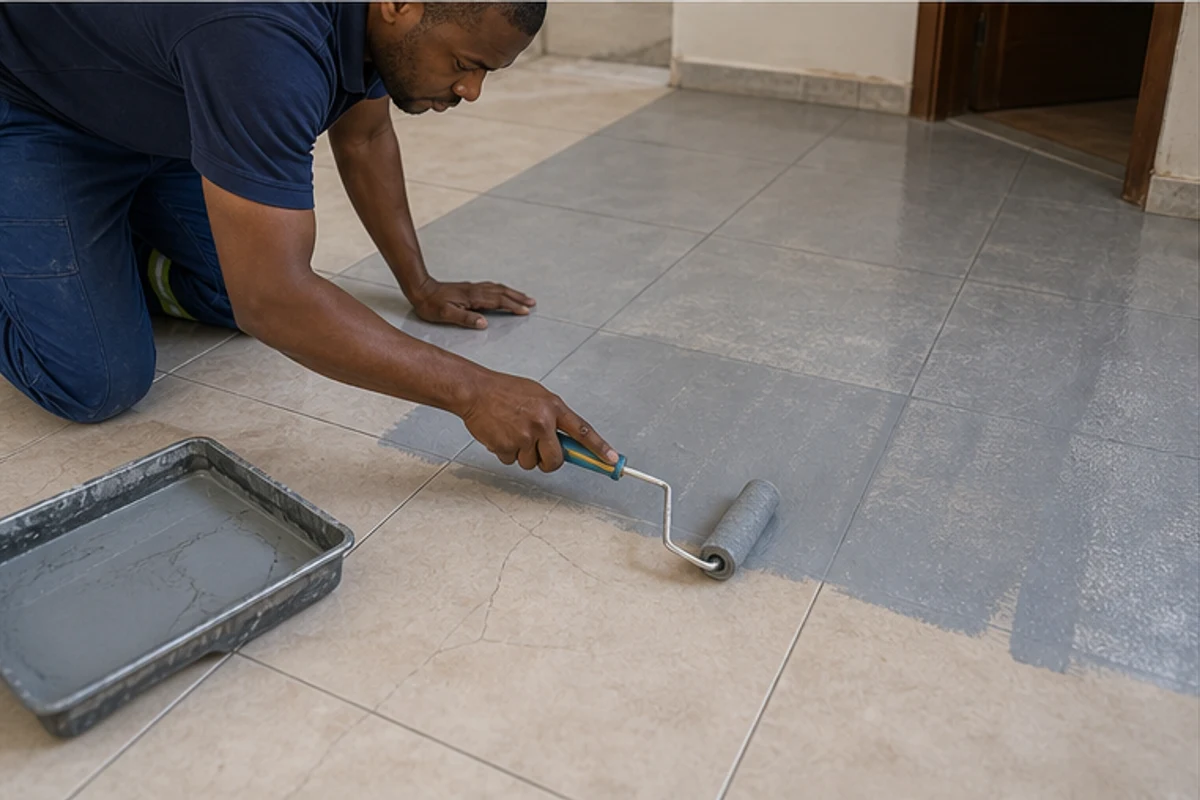
Selecting a polymer-modified adhesive
Use a polymer-modified tile adhesive designed for bonding to existing tiled surfaces and varied substrates. Match the product to your tile size and area — heavy or large tile needs a stronger adhesive.
Natural stone needs specialist adhesives; do not proceed if the stone is friable or shows delamination.
Notched trowel application techniques
Apply adhesive with a notched trowel to create even ridges and full contact. Work in small areas so the adhesive does not skin over before you lay new tiles.
- Comb the adhesive consistently; avoid gaps beneath the tile layer.
- Mix adhesives to the manufacturer’s instructions for correct consistency.
Managing expansion and movement joints
Install perimeter expansion joints and movement joints over structural breaks to protect the bond. Follow SANS 10107:2011 for joint spacing and placement.
“Movement joints protect the finish — they are the simple step that prevents large repairs later.”
| Requirement | Action | Why it matters |
|---|---|---|
| Surface preparation | Clean, dry, dust-free | Adhesive contact and long-term bond |
| Adhesive type | Polymer-modified per tile size | Prevents bond failure and cracking |
| Trowel technique | Notched trowel, full bed | Ensures tiles firmly seat to substrate |
| Movement joints | Perimeter and over structural joints | Allows expansion; avoids stress cracks |
Managing Floor Heights and Door Clearances
When you add a new layer the extra thickness can change door clearances and thresholds. Tiling over old tiles usually doubles the floor build-up and can make doors stick or skirtings sit proud of the finish.
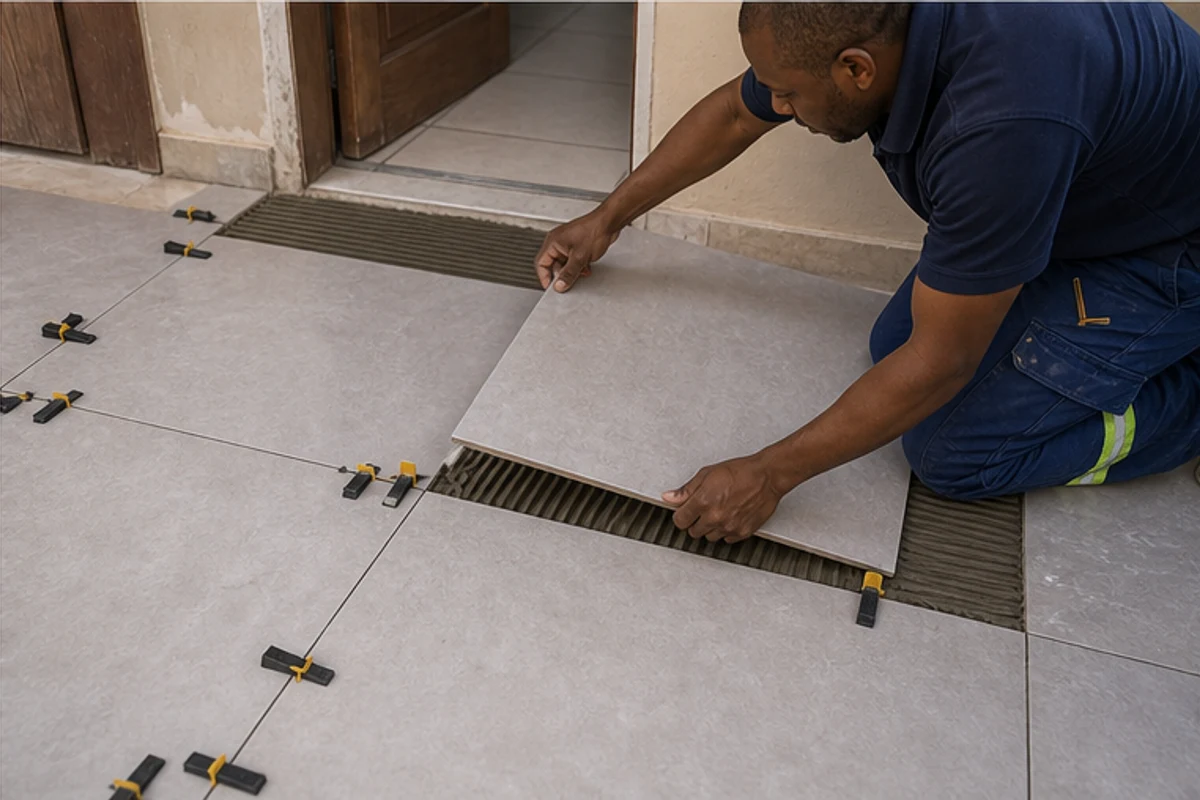
Always measure clearances under doors before you commit. Check cooker and washing machine feet, built-in cupboards and internal thresholds so appliances still fit after the work.
A screed on a balcony must be at least 50mm thick and fully set before any tile work begins. That requirement affects time and sequencing of your tiling and waterproofing.
- Account for added thickness; it affects floor level between rooms and risers.
- Discuss door trimming, thresholds or transition strips with your contractor during the site visit.
- Choose a professional tile adhesive application to keep the new layer as thin as possible while ensuring a strong bond.
“Check clearance under doors and across rooms to avoid surprises after installation.”
| Issue | Action | Why it matters |
|---|---|---|
| Raised floor level | Trim doors or add transition strip | Prevents rubbing and safety hazards |
| Balcony screed | Minimum 50mm; cure fully | Protects waterproofing and bond |
| Appliances/fixtures | Confirm heights before work | Avoids rework and extra cost |
Make sure your contractor inspects levels, the substrate and grout lines on site. Our platform connects you with Benoni contractors who can advise on practical height solutions and produce a quote that notes any door or threshold work needed.
Comparing Costs and Labour for Your Project
A clear cost breakdown saves you surprises when planning a tile job in Benoni.
Start by asking contractors for a quote that lists materials, labour and the specific tile adhesive needed for the job. A quoted price should state the cost per square metre, the type of adhesive, and any surface preparation required.
Rands handed to a tiling price guide
Use our platform to request up to five quotes so you can compare the price of tiling over old tiles versus removing old and redoing the substrate. Tiling the existing layer usually cuts time and labour, but only when the substrate and bond are sound.
Make sure your quote includes repairs for any cracks, the correct tile adhesives for the tile size, and labour for grout and finishing.
- Confirm whether the quote covers dust control, waste removal and any trimming of doors.
- Ask for the cost of a notched trowel or specific tools if the contractor includes them in materials.
- Verify prices for ceramic tile and natural stone separately — adhesives and application differ.
“A transparent quote protects you from added costs and unexpected delays.”
| Item | Typical Rand range (m²) | Why it matters |
|---|---|---|
| Materials (tiles + grout) | R150 – R600 | Tile size and type change cost significantly |
| Tile adhesive (polymer‑modified) | R40 – R120 | Correct adhesive ensures bond and longevity |
| Labour (removing old vs overlay) | R80 – R300 | Removal raises time and labour costs |
| Surface preparation and repairs | R50 – R200 | Crack repairs and levelling prevent failure |
Our Platform for Connecting with Trusted Contractors
Connecting with local professionals makes a complex tile installation far easier to plan. Use buildingcontractorsinbenoni.co.za to start the quote process and reach independent contractors who serve the Benoni area.
Request 3–5 quotes so you can compare approach, adhesive choice and surface preparation. Our platform lets you request up to three building quotes, or up to five quote options where available.
We do not employ builders or perform work ourselves. Contractors listed on buildingcontractorsinbenoni.co.za are independent and handle site visits, final quotes and the work quality on your property.
- Compare proposals for substrate repairs, adhesive selection and application methods.
- Confirm timelines, warranties and grout work in writing before any installation starts.
- Check how each contractor manages moisture and bond testing during the site visit.
“A written quote clarifies scope and protects your budget.”
Use the platform to find local pros who understand door clearances, water management and the practicalities of tiling in Benoni.
Final Thoughts on Achieving a Durable Tiled Finish
A strong finish starts with the right surface work and the correct tile adhesive choice. Make sure the surface is clean, dry and level before any installation begins.
Focus on the bond and the careful application of grout to seal joints. Use high‑quality adhesive products suited to your tile size and location to help new tiles adhere and resist moisture.
Maintain the finish with regular cleaning and occasional grout resealing. Take the time to select suitable tile adhesives and confirm details in writing with your contractor.
If you need help, our platform connects you with qualified contractors in Benoni who can inspect the surface, advise on adhesive choice and provide written quotes.
FAQ
Can I tile over existing tiles in Benoni?
Yes, you can often tile over existing tiles in Benoni, provided the original surface is firmly bonded, level, clean and free of loose or cracked pieces. Complete a tap-test to check for hollows, remove any loose tiles or grout, degrease the surface and confirm door clearances and finished floor height before proceeding. If there are many cracks, damp problems or movement in the substrate, removing the old tiles is the safer choice.
How do I know if the current tiled floor is sound enough?
Perform a tap-test across the whole area: a solid sound means good adhesion, a hollow or dull sound indicates poor bond. Also inspect for hairline cracks, lifting, or movement at junctions and penetration points. Ensure the substrate beneath the tiles is stable, clean, dry and free of dust, grease or moisture that could prevent a reliable bond with the new adhesive.
What surface preparation is required before tiling over ceramic tiles?
Thorough cleaning and degreasing is required, followed by mechanical sanding or scotch‑brite to dull glossy glazes. Remove loose grout, fill deep joints or cracks, and apply a primer or bonding slurry where recommended. Apply a polymer‑modified tile adhesive suitable for bonding to glazed or ceramic tile surfaces, and use the correct notched trowel for the tile size to achieve the specified bed thickness and coverage.
Which adhesive should I use for natural stone or large-format tiles?
Use a high-quality polymer‑modified cementitious adhesive rated for natural stone or large-format tiles. For heavy or larger tiles choose an adhesive with improved open time and slip resistance. Follow manufacturer guidance for bed thickness, mixing ratios and curing time. For some stones, test for staining and use a suitable backing or bedding method to prevent efflorescence and moisture issues.
What notched trowel size is best for my tile project?
Match the notched trowel size to the tile size and backing: typically a 6mm x 6mm square notch for small tiles, 8mm for medium and 10mm–12mm for large-format tiles or uneven backs. The correct notch ensures full contact and adequate adhesive coverage; aim for at least 80–90% coverage on floors and 100% coverage under large tiles where possible.
How do I manage expansion and movement joints when tiling over tiles?
Maintain existing movement joints and extend them through the new tiling system. Add perimeter joints at walls, doors and changes of substrate. Use flexible sealants and compressible joint fillers as required. Failing to carry movement joints through the new finish risks cracking and debonding as the substrate expands or contracts.
Will tiling over tiles raise the floor level and affect door clearances?
Yes, adding a new tile layer increases finished floor height. Check door clearances, thresholds and skirting board depths before work starts. Sometimes trimming doors or adjusting frames is needed. Confirm these changes in writing with the contractor and factor labour and materials into the quote.
When should old tiles be removed instead of tiled over?
Remove tiles when the existing layer is loose, when there is significant substrate damp or structural movement, when the height build-up is unacceptable, or where the new tile bonding requires a different substrate (for example timber floors that need decoupling). Also remove if the old surface is heavily contaminated with oils or other residues that cannot be safely prepared.
How much does tiling over tiles cost in Rands and what affects the price?
Costs vary by tile size, adhesive type, floor area, surface preparation, access, and labour rates in Benoni. Expect additional costs for levelling the floor, cutting tiles for door thresholds, movement joints, and specialised adhesives for natural stone. Ask for up to 3 independent quotes through our platform to compare materials, labour, warranties and timelines.
How long before grout and traffic after tiling over tiles?
Curing times depend on the adhesive and environmental conditions. Most polymer‑modified adhesives allow grout after 24–48 hours and light foot traffic after 48–72 hours. Heavy traffic and full bedding strength can take up to 7 days. Follow the adhesive manufacturer’s recommendations and confirm drying times in writing with your contractor.
Can tiling over tiles cause moisture problems or affect waterproofing?
If the original waterproofing is compromised or unknown, tiling over can hide leaks and worsen moisture issues. For wet areas, ensure the existing waterproofing is intact and that wall and floor junctions are properly sealed. Where necessary, remove the old tiles to inspect and renew membrane systems before tiling.
How do I find trusted tilers in Benoni through your platform?
Request up to 3 quotes from independent contractors via our platform. Provide relevant details: area in square metres, tile size, current surface condition, access, desired finish and any timing constraints. Contractors will arrange site visits, provide written quotes, timelines and warranty terms. Compare materials, labour and approvals before appointing a tiler.
Related building cost guides
Ready to compare?